Before we get started, I thought you might want to meet Wallace.
Wallace is the latest addition to my stable of wood spirits. I originally thought about calling him Cyrano because of his nose, but my daughter thought he looked like one of the characters in the Wallace & Grommet claymation movies, so, Wallace, he became. He serves as another example of the great variety of things we humans recognize as faces.
And now, to business!
The next thing we want to do is give the upper part of the face a little depth, so we are going to carve a flat plane from the nose up to meet the hair line. Start about 1/4" above the nose cut. You want to leave enough wood to give you some options later on. We want to establish the depth of the hair line to be a little less than the depth of the nose cut. I am using a push cut here as I showed you in the
previous post.
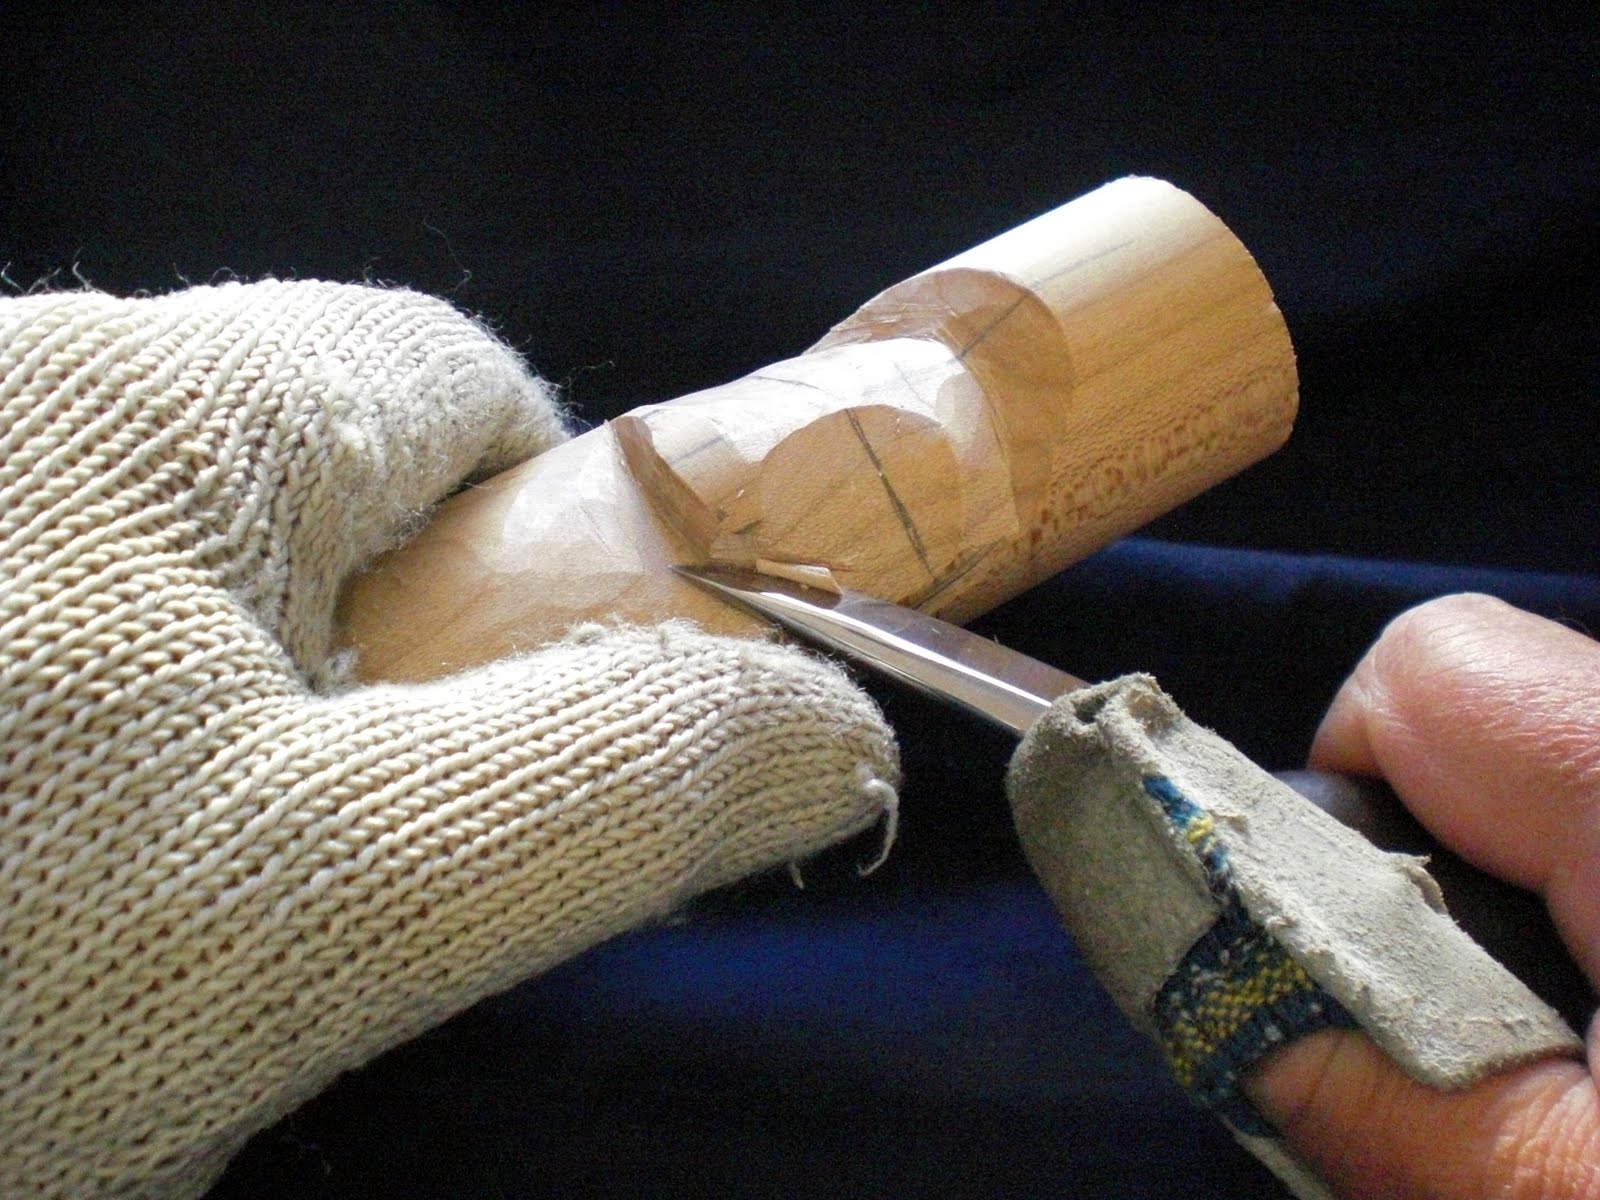
Push that cut all the way up to the furrow you cut along the hair line. You may well have to readjust your grip on the wood to finish the cut. That's OK. Take a look at the chip I've raised here. Your chip shouldn't be any thicker than this one.
You may find it easier to use the lever cut technique, using the thumb of your holding hand as a pivot point. By using the last third or quarter of the blade length as shown here, you'll get a longer cut with less force.
This is about what your first cut should look like.
As you deepen the cut at the hair line, you'll want to cut down from above also. On most people who don't sport a rockabilly hairdo the hair doesn't jut out from the forehead at a right angle. Here I'm using what I call a pivot cut. I have planted my knife-hand thumb against the wood and am pivoting the knife around that point down into the wood. This is a fairly safe cut, even though you are cutting back toward your holding hand, for three reasons. First, you are cutting down into the wood. The blade will stop against the bottom of the cut you just finished up from the nose. Second, by using this pivot cut you limit the travel of the blade. It can't move more than an inch or so, and your thumb and holding hand are out of the way. Third, you'll be taking multiple thin cuts, so you don't have to use excessive force. And (remember this?) excessive force is the most common cause for knife slippage.
At this point, your carving should look similar to this.
Left side view. As you can see, the depth of the cut at the hair line is not quite as deep as the depth at the nose cut.
Now we need to start carving in the areas where the eyes will be. You want to cut another flat plane on both sides of the face's center line from a point just below where you started the hair line cut up to the hair line.
Again, you'll be making multiple thin cuts.
When you're done, your carving should look something like what you see on the left side of the center line. On the right of the center line, I've already done the next step, but fear not, I'll show you the cuts in a bit.
A side view of what I call the eye plane.
Now you want to scoop out a concave chunk of wood from the bottom of the eye plane cut you just did to a point just above the eye line. You want to angle the knife edge down into the wood then, as the cut progresses, turn the knife edge horizontal then up leaving a dip in the wood,
Due to the grain direction you will get a little tear out as you see here. Don't worry about it.
Just grab the piece by the other end and cut down toward the bottom of the dip with the same technique you used above. Be careful because you won't have as much wood to hold onto as you did cutting from below. So use the lever cut and make thin cuts. You'll be able to smooth out the bottom of the dip using very light cuts with the tip of the blade.
Make a cut from the top of the dip you just carved down and back to the hair line. This will establish your carving's eye brows.
Once you are done, begin doing the same thing on the other side of the face. Try to keep the two sides as symmetrical as you can. Both sides don't have to be exactly the same, but keeping them nearly the same at this stage will simplify things later in the carving process. You will probably have to go back and make some corrective cuts on one side, then the other. I did! When you are done your carving should look something like this.
Left hand view.
Right hand view.
Use your pencil to extend the eye lines from the remnants of the eye line that you drew past the hair line. I told you that would be useful!
We're going to stop now. You must be tired. I know I am! Strop your knife really well so it will be as sharp as you can get it when we begin again. I can't emphasize enough the importance of stropping often.
Next time we'll work on the lower part of the face. At this point the temptation is to continue with the eyes, but that's really not a good idea. Most beginning carvers want to begin carving detail way too soon in the process. You want to get all the major forms on the face carved before you start any kind of detail carving. If you started detailed carving on the eyes now, probably you would make them too small. You need to have your nose better established to get the eye size right. Form must always precede detail. The basic form gives you the location and size of the details. So don't get in a hurry.
Until next time, let those chips fly.